


The Complete Guide to
Selling on E-commerce
Platforms
Maging winner na online seller sa e-commerce sites with this complete guide from SoShop!
Find A Branch

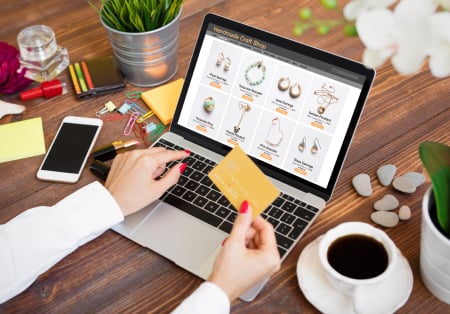
Setting Up Your Store on Ecommerce Platforms
If you’re looking to set-up a website with a add to cart function, then an ecommerce store is the way to go! An e-commerce platform allows you to set-up a website without the need for a web developer, saving you thousands of Pesos. If you want to start selling on an e-commerce site, here’s what you need to know to get started.

Step-by-Step Guide on E-commerce Selling
For onlinel sellers who want to start their own dropshipping business, starting an e-commerce store is their best option.
Here are some parts of an e-commerce platform you should know about:
- Point of Sale (POS): E-commerce platforms have built-in POS that let you process your customers’ payments online or in-person. This is useful for establishments such as restaurants or shops with brick-and-mortar stores.
- Payments: E-commerce sites allow you to collect payments from your customers via credit card, Dragonpay, GCash, GrabPay, and more. You can also integrate your POS apps from your e-commerce site and other vendors.
- Shipping: Online sellers can calculate shipping rates through the e-commerce platform. This includes insurance, labeling, and tracking.
- Theme: Many e-commerce platforms have built-in themes that make it easy for you to build a custom website without hiring a developer. There are tons of free and paid themes available for you to choose from.
- Apps: There are several different functions and features you can easily integrate into your e-commerce store. These apps include marketing, sales and promotions, social media, reporting, and more.

Take note that e-commerce platform will simplify the dropshipping process, but online sellers still need to do the following on their own:
- Find a product to sell
- Negotiate with manufacturers
- Manage inventory
- Coordinate shipping
- Handle Package
- Fulfiill Orders
If this seems overwhelming for you, don’t worry. SoShop! can help you take care of your inventory, shipping, packaging, and order fulfillment!
Setting Up an E-commerce Store
An important thing to note about setting up an e-commerce store is that it won’t be free. You can, however, start with a 14-day free trial to see if an
e-commerce platform is the right fit for you before committing to this platform. Just click on the “Start free trial” button on the top bar.
-
Register your store
Once you’ve decided that this is the platform for you and you’ve decided on the plan you want to purchase, you’ll need to claim your store. Just fill in the necessary details including your name, products and/or services, photos, contact information, location, etc. -
Choose your e-commerce theme
As we’ve mentioned earlier, e-commerce platforms give you tons of theme options to choose from. You’ll want to pick a theme that reflects your branding and that can attract potential customers.
Each e-commerce platform will have a unique interface as to how you can update your theme, so play around with the commands to see which fits best. Most e-commerce platforms will have both free and paid themes available for you to choose from. We recommend investing in a paid theme so you can really customize it and make it fit your business’s branding. -
Add your products
Once you’ve set-up your e-commerce store, you’ll need to add your products so your potential customers can see them.
Click on “products” on the admin panel. This allows you to manage your inventory. If you have a large inventory, you can click “import” and simply upload them in bulk from a CSV file. However, if you don’t have a prepared file just yet, you can follow the “sample CSV template” link provided by the e-commerce platform.
If you have less than five products to upload, you can simply upload them one by one. Click Add to Product then fill in the product details and upload the images.
-
Setting Payment Methods
To setup payment methods, go to the Settings section in your bottom left corner and then select Payment providers. In the Accept credit cards section, select Add a provider. Complete the process by entering your store and banking information that is required. Click Complete account setup.

-
Define your store policies
The last step you’ll want to do before launching your e-commerce store is to define your policies. This protects your business against any legal issues between you and your customers.
Policies to establish are for:
- Shipping
- Terms of Service
- Refunds
- Customer Privacy
- Legal and compliance
These policies will appear at the footer of your e-commerce store. To add
them, click the “Add shipping policy” button.
How SoShop! Helps E commerce Sellers
SoShop! is committed to moving your business forward. SoShop! can help you with your shipping and logistics including COD shipping, deliveries, and tracking all of your packages. SoShop! also lets you use all of LBC’s tools and schedule your own pickup from the comfort of your home using the SoShop! dashboard. Apart from these, SoShop! also gives e-commerce sellers exclusive access to our classes and workshops so that you can learn from various industry experts how you can expand your business to reach your business goals.
Join our free SoShop! community today to unlock all of these great features at maging winner na online seller sa e-commerce site!
Ano pang hinihintay mo?
Sign Up with SoShop! today!
Sign Up with SoShop! today!
Questions about SoShop!
Got any more questions about SoShop? Learn the answers to SoShops frequently asked questions so you can discover more about our features and benefits. Learn tips, tricks, and important facts about what makes SoShop! so unique.


